I use slip stitch ribbing (also called SLST BLO) to create a fabric that looks like knitting and stretches like knitting.
In order to make these you will need to be comfortable with slip stitch ribbing and using gauge & measurements to calculate stitch counts, as well as basic use of LibreCalc or Excel.
I seam using the Bickford Stitch.
I like having a notepad handy to write and draw, as well as using LibreOffice LibreCalc (which is free). Google Sheets is not ideal because it doesn't make it easy to resize rows and columns. Excel's horizontal scroll bar is annoying to me, but many people use it for this kind of charting so use it if you like it.
These are not perfect instructions, moreso notes on what I happen to do so hopefully other people looking to make similar socks don't have to start from scratch in figuring things out.
Construction
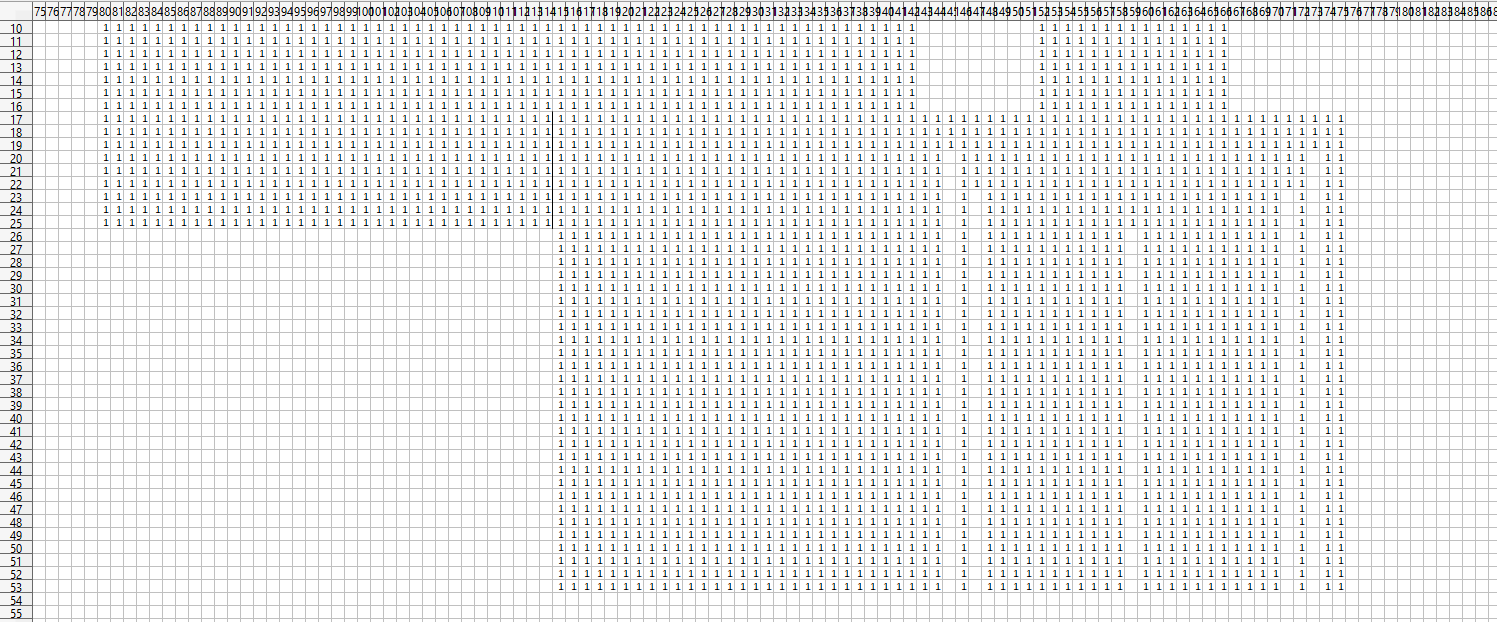
This is the general shape of the sock as you make it:
The top black edge represents the cuff. The red lines (1 to 2) will be seamed together and the blue lines (9 to 10) will be seamed together. The pink, orange, and yellow lines will be joined as you make the sock.
At the bottom black edge, the body of the sock is joined to the toe while you work. The toe will already be completed and seamed. This means that the body of the sock is not truly made "flat" as shown in the diagram; it will curve as it is joined to the toe.
We will be filling in measurements on this outline as we go along:
Toe
Swatch in SLST BLO. Use the smallest hook comfortably possible (i.e. without splitting the yarn).
Measure the circumference of your foot, around the knobby part at the skeletal base of your toes (the "ball" of your foot). You want your sock to have some negative ease - to be around 10% smaller than your actual foot, otherwise it will be too loose. So multiply this measurement by 0.9 to get your sock circumference. Your stitch count should be rounded down to the nearest even number.
Your sock toe will be shaped like this:
The green edges will be seamed together. The blue edges at the top will be worked into the same chain, and the purple "V" in the middle is made of short rows, each 1 stitch shorter than the previous, until you get to a length of 3 stitches, at which point each row will be 1 stitch longer than the previous. The black edge is what you will join the body of your sock to.
T = width of big toe and the toe next to it combined, measured near the top of the smaller toe's toenail
T/3 should be rounded UP to the nearest stitch.
You can see that the green line on both sides is slanted. This portion is done similarly to the "V" in the middle, with short rows shorter or longer than previous ones by 1 stitch.
T, T/3, and sock circumference are all we have figured out so far. We need to figure out the length of the toe. The length of the toe is dependent on T, T/3, and sock circumference. Let me show you an example of one of my sock toes so you can see where we're going:
 |
"T-1" means the T measurement, in stitches, minus 1 stitch pair.
Here that is 12 - 1 = 11, so you can see the T-1 section is 11 wide. |
[The "1"s in this graph do not represent individual stitches, they represent the stitch pairs/columns that create slip stitch ribbing's characteristic knit-like v-stitches. This is how I chart my slip stitches and how I will demonstrate.]
Here is where I recommend using LibreCalc/Excel. Set the column width to 0.2".
In this example, my sock circumference (foot circumference * 0.9 rounded down to the nearest even number) is 58 stitch pairs. T is 12 stitch pairs, T/3 is 4 stitch pairs. Start with three rows the width of your sock body circumference. (Don't enter these "1"s in manually, type one in, copy it, then select the area you want to fill with ones and paste.)
Now, add a long line on each side.
Now, put T+(T/3) columns on each side, including the line already placed in your count - in this example, T is 12, and T/3 is 4, totaling 16. We already have one column down, so add 15 to that to get 16 total.
In order to make it easier to remember where T/3 is, remove most of the T/3 portion from each side (leaving just the three rows at the top). We'll fill it back in properly later. T/3 should not be taken from the edge, but instead from one column in as pictured.
Now, find the middle of the whole thing. You should have 2 middle columns, since the sock body circumference is an even number. Use the one on the left as your middle. I will highlight mine in green. To the left of this middle column, make the columns 1 stitch longer than the previous, lengthening toward your T section.
Do the same on the right, but increase only to the same row as you have on the left.
Now cut/paste the rightmost T section to fill in the gap. The adjacent T/3 section should become 1 column wider to compensate (in this case, it will no longer be 4 wide, it will be 5 wide).
Now cut off the excess. In this case, you can see that the "V" section goes until row 15. We will clear row 17 and beyond.
We've figured out the toe length. In this example, it's 16. Now, let's fill in T/3 on both sides.
That's your toe. As you can see, the rightmost T/3 section is 1 column wider than the leftmost T/3 section, and goes up 1 stitch higher. This is correct.
Each side including the edge column should sum to T as shown:
Now how do you actually turn this graph into a sock toe?
Chain T + toe length, plus 1 as a turning chain. In this case, 12 + 16 = 28. Plus 1 is 29.
SLST BLO in the second chain from the hook and down (normally, NOT in back bumps) until you have the toe length number of slip stitches done (in this case, 16) and T chains remaining (in this case, 12).
Now slip stitch into the back bump of the next chain.
Chain 1, turn, skip 2 stitches (the chain and the joining SLST) and SLST BLO back up. Chain 1, turn, skip 1 stitch (the chain) and SLST BLO back down, stopping as many stitches away from the chain as indicated by your chart in column 2. In the example, this is 4. So stop 4 stitches away from the chain, chain 1, and turn. Go back up the row, chain 1, turn. Go back down, and this time, stop 3 stitches away from the chain. And so on as the chart dictates. When you reach the straight section, SLST to the chain, chain 1, turn, skip 2, SLST BLO back up, repeat as many times as indicated by your chart.
When you reach the "V" part, stopping 1 stitch short of the previous row should be pretty straightforward, as indicated by your chart. But when it comes time to go back down, it will not create a flat look like in the chart. It will result in a corner like this:
 |
At this point, SLST BLO back down and into the final stitch at the bottom, then SLST join to the chain.
|
As you work the rest of the toe and slip stitch join to the chain on the other side, it will create a folded toe like this:
You'll want to count along the top to make sure you haven't skipped a column (it is easy to do this accidentally after the "V" section), then once you are sure it is correct, cut a tail long enough to seam.
Flip it inside out, seam along the side, flip it back, and your toe is done.
You will need 2 toes, and they are both made this way (they are identical).
Body Measurements
If you are using the same yarn for the body as you did for the toe, the sock circumference will be the same for the body as it was for the toe.
If you are using a different yarn than you did for the toe, you will need to swatch again and re-calculate sock circumference for the body. (If the numbers are different, instead of joining the sock body 1-to-1 with the sock toe as you work, you will have to calculate a different rate of joining. I'll explain how to do that later.)
Firstly, measure your instep circumference.
Multiply your instep by 0.9. Round down your stitch count to the nearest whole number. (Instep x 0.9) - 1/2 sock circumference = bottom of sock at instep. We'll call this F. You should have these measurements down on your outline:
Now trace & measure the widest part of your heel - both feet, and use whichever heel's larger. We'll call this J. J (in stitches) should match F in odd/evenness. This is how wide your heel semicircle will be. The height of your heel semicircle will be the same measurement, but will likely have a different stitch count.
Now we need to find the measurement of the bottom of the heel flap (W).
If J is even, W = semicircle height (in stitches) x 2.
If J is odd, W = (semicircle height (in stitches) x 2) + 1.
Returning to the construction outline, see that the pink lines (points 3 & 4) will be joined with each other, the yellow lines (points 5 & 6) will be joined with each other, and the orange lines (points 7 & 8) will be joined with each other, in order to create the heel:
The colored/numbered lines are the same length as their corresponding colored/numbered line. Additionally, the pink (3 & 4) and orange (7 & 8) lines are all equivalent.
We find the length of the pink and orange lines with (F - J)/2. This measurement applies to all four of those lines. Calculate this using the stitch counts rather than inches or cm.
Sock body height = (length of foot x 0.9) - semicircle height - toe height.
The remaining two measurements at the upper left corner are sock ankle length and leg circumference (which should be the actual circumference x 0.85). These are up to your preference depending on how long you want the sock.
I usually base it on how much yarn I have: I figure out the stitches per gram from my swatch, multiply that by how many grams I have, divide that by 2 for 2 socks, then subtract however many stitches I will have in the body and heel. Though in order to figure that out, we need to make the actual chart to work from. Back to LibreCalc!
Body Chart
To start, I make a placeholder ankle section as tall as the semicircle height, as wide as the W measurement + 1/2 sock circumference.
Then I add the back of heel, as wide as W and as long as (F - J)/2. Add a border on the right edge of this addition.
 |
| Right border button highlighted in menu. |
 |
| Border highlighted. |
Then add the body of the sock, as wide as 1/2 sock circumference + F, as tall as sock body height.
Then add a rectangle as tall and wide as the heel semicircle will need to be (semicircle height and J). There should be (F - J)/2 stitches on either side.
 |
| Zoomed in. |
If J is even, leave 2 stitches at the top and trim away the rest on either side. If J is odd, leave 3 stitches at the top and trim away the rest on either side. Then trim away 1 less on either side as you go down, until you've reached the edges.
Now F - 1/2 sock circumference is the amount of stitches needed to be cut from the bottom of the foot. In my case, 33 - 28 = 5. I'm going to start 2 columns in from each side of the sock bottom, 3 rows down from the edge, with each cut row going down 3 rows further than the previous one with 1 plain column between them. They will be symmetrical on either side; if there is an odd number, the extra should be in the center (with even stitch counts it will have to be slightly off-center). As pictured:
 |
| Zoomed in. |
 |
| Slightly more zoomed in. |
Now cut everything right of the border, paste it 1 column to the right, and add a partial column in between the heel flap and top of body, stopping it at the border. This is not an intentional short row but will be created during the transition from heel flap to body or vice versa (you will see later, but this makes the chart more accurate if you're using it to see how many stitches you'll be using, or if you are going to add colorwork).
 |
| Border highlighted. |
At this point, I usually select the entire sock body to see how many stitches will be needed so far, subtract that from the total stitches I can use per sock that I calculated earlier, and divide that by the placeholder ankle width (W + 1/2 sock circumference) to get a rough idea of the additional ankle height I can do with the yarn I have. This doesn't account for yarn used in SLST'ing to other pieces, which can add up, or the transitional partial rows between the top of the sock and the heel flap/back of ankle - however, once the columns are cut out to shape the ankle, I find that this tends to even itself out.
Cut the sock body you've made so far, then paste it at the row below the ankle length you want to add. In this case, I want to add 33 more rows of ankle (in addition to the 16 I already have in the placeholder), so I'm going to paste at row 34.
Now fill in the heel above:
Now this will need to be shaped to fit your ankle/leg circumference. Measure at the point your sock cuff will hit, and multiply that by 0.85. (Stitch count should be rounded down to the nearest odd/even number depending on whether W - the back of the heel - is even or odd.) If you are making long socks, this measurement might be more than the current ankle width, but most of the time it's going to be less, so that's what I'll demonstrate (the concept is the same either way, you just do the short rows wherever is wider - so do them at the top if the leg is wider).
Currently the measurement is W + 1/2 sock circumference.
Subtract the ankle/leg x 0.85 measurement from that W + 1/2 sock circumference measurement to find the difference.
In my example, 69 - 61 = 8. So I'm going to cut out 8 lines from the top of the sock like I did at the bottom of the sock, just upside down. Still 1 column apart, starting 2 columns from the edges, but I'm only going to bring them down until the border starts. I want the "decreases" to be at the back of the ankle, above the sock heel flap.
If you need too many decreases and can't fit the heel curve at the bottom while also fitting the ankle at the top, you can condense the decreases a little bit; instead of having them be 3 stitches above the previous, do a difference of 2 stitches.
 |
A zoomed-in example of an odd number (7) removed. The decrease rate can be adjusted as necessary, e.g. if you have a very short sock you might have them 2 stitches up from the previous rather than 3.
|
Now you have the entire sock charted out. It should look something like this:
Actually Crocheting the Body
The left and right socks are made slightly differently in order to make the seams symmetrical.
Left Sock
The left sock is what the chart shows. Start by making the back of heel/ankle. This section:
Leave a long enough tail to sew it at the end (length x 3 + 8" is usually enough - e.g., this example is planned to be 5.9" long with my gauge, so ~ 26" is long enough for the tail).
This example is 53 tall and 38 wide, so I start by chaining 53 + 1, SLST BLO in 2nd chain from hook, and down. And back up and down, and then 10 stitches up and then back down for my first short row, then all the way up and back down, and so on. Once you are done with the section, it should look like this:
Now we need to join to the toe. SLST BLO back up.
SLST BLO back down until you have the border length of stitches left ((F - J)/2).
Chain sock body height.
Now SLST to the edge of the toe right next to the seam, in the spot pictured.
Chain 1, turn. Skip 2 stitches (the chain and the joining SLST). SLST up and back down, and SLST it to the same toe stitch as shown above for the first column.
As you continue on going back up and down, SLST to adjacent toe stitches along the toe.
If you have different body and toe gauges (i.e., if you're using significantly different yarns), you will need to estimate a joining rate that includes instances of either joining two columns to a single sock stitch or joining a single column to two sock stitches, depending on which stitch count is higher.
Bigger number - smaller number = difference.
Toe circumference/difference = one instance per this number of sock stitches.
In my case, my toe is 74st circumference and my sock will be 60st circumference.
74 - 60 = 14
74/14 = 5.28571428571
Rounding to 5, that means I will need to join one column to two sock stitches every 5 sock stitches. So I will go along and do 3 normal joins, then for every 4th column, I will SLST to two sock stitches at once. So 4 columns joined to 5 sock stitches.
[ If my stitch counts were reversed (i.e., if I swapped my body and toe yarns at their current gauges), I would have more stitches in the body than the toe. If this was the case, I would do the same math but end up needing to join two columns to one sock stitch every 5 stitches. So I would go along and do 5 normal joins, then for every 6th column, I would SLST to the same sock stitch as the previous column. This would result in every 5th and 6th column sharing a sock stitch. 6 columns joined to 5 sock stitches. ]
This isn't exact, so I will need to pay attention when doing the last bit of the sock to adjust as needed to make sure my stitch counts are matching up. I will tell you when you need to check this.
 |
| Pull up a loop in each of the toe stitches, |
 |
| then pull the leftmost loop through the other two. |
Once the top of the foot is complete, it should look like this:
You should have about half the toe stitches joined, and half to go. If you are more than 2 stitches off from the center side 3 st bit, you might need to adjust where/how you join the last one or two columns to the toe as discussed above.
To start on the bottom of the foot, SLST BLO up ((F - J)/2) + sock body height.
Then curl the top of the ankle/leg around with the right side facing out to access the unjoined side of it. SLST to the side (F - J)/2 stitches from the bottom corner. (In this case, (F - J)/2 = 10, so I am SLST'ing into the 10th stitch from the bottom corner.)
Chain 1, turn (skipping 2 stitches: the SLST and the chain). SLST BLO back down.
Repeat, SLST'ing to the next stitch closer to the corner.
After two columns, there is a short column:
SLST BLO up, SLST to the next stitch closer to the corner. Chain 1, turn, skipping 2 stitches (the chain and the SLST). SLST BLO 3 stitches back down. Chain 1 and turn, skipping 1 stitch (the chain). SLST BLO 3 stitches back up, SLST to the next stitch closer to the corner. Chain 1, turn, skipping 2 stitches (the chain and the SLST). SLST BLO back down.
That completes both the short row and the adjacent full column:
When the side is complete, it looks like this:
Now the heel semicircle. SLST BLO up, and when you reach the top, you will SLST to the bottom of the heel flap. These stitches:
Chain 1, turn. Skip one stitch (the chain), SLST BLO back down to finish the column.
When you come back up, to make the "steps" of the curve, SLST to the next stitch at the bottom of the heel flap. Chain 1, turn, and skip one stitch (the chain). SLST BLO back down to finish the column. Doing this adds a stitch at the edge.
Repeat this as needed to match your chart.
Then, to create the flat top of the semicircle, continue SLST'ing into adjacent heel flap stitches, but when you turn, skip 2 stitches (the chain and the SLST) to keep the stitch count the same.
 |
| This picture is an earlier version of the heel, so there are 8 stitches across at the top. Your sock should only have 2 or 3 stitches at the top according to your chart. |
 |
| This heel is 3 stitches across at the top. |
To create the "downward" set of steps, stop 1 stitch short of the edge of the semicircle, SLST to the next stitch of the heel flap, chain 1, turn, skip 2 stitches (chain and SLST).
This reduces 1 stitch each time.
For the last "step"/last column of the semicircle, on the SLST BLO row back down, the stitches will be joined to the heel flap bottom as you go down.
Stop 1 stitch from the end, as usual. Flip the sock inside out. Chain one, and position the work as such that you can go through the heel flap bottom as you insert your hook into the semicircle stitches:
And continue down with SLST BLO to join to the toe as usual. Flip the sock back right side out.
To make the next side, make sure to only come up for as many stitches as the sock body height. Count your stitches.
Then put the hook in from back to front, SLST, chain 1, turn and skip 2 stitches (the chain and the SLST). This side is a mirror of the other side.
If your toe and body have different gauges that have been accounted for in an altered rate of joining at the toe, check now to make sure the stitch counts will line up and adjust as needed. Keep in mind the short rows at the top.
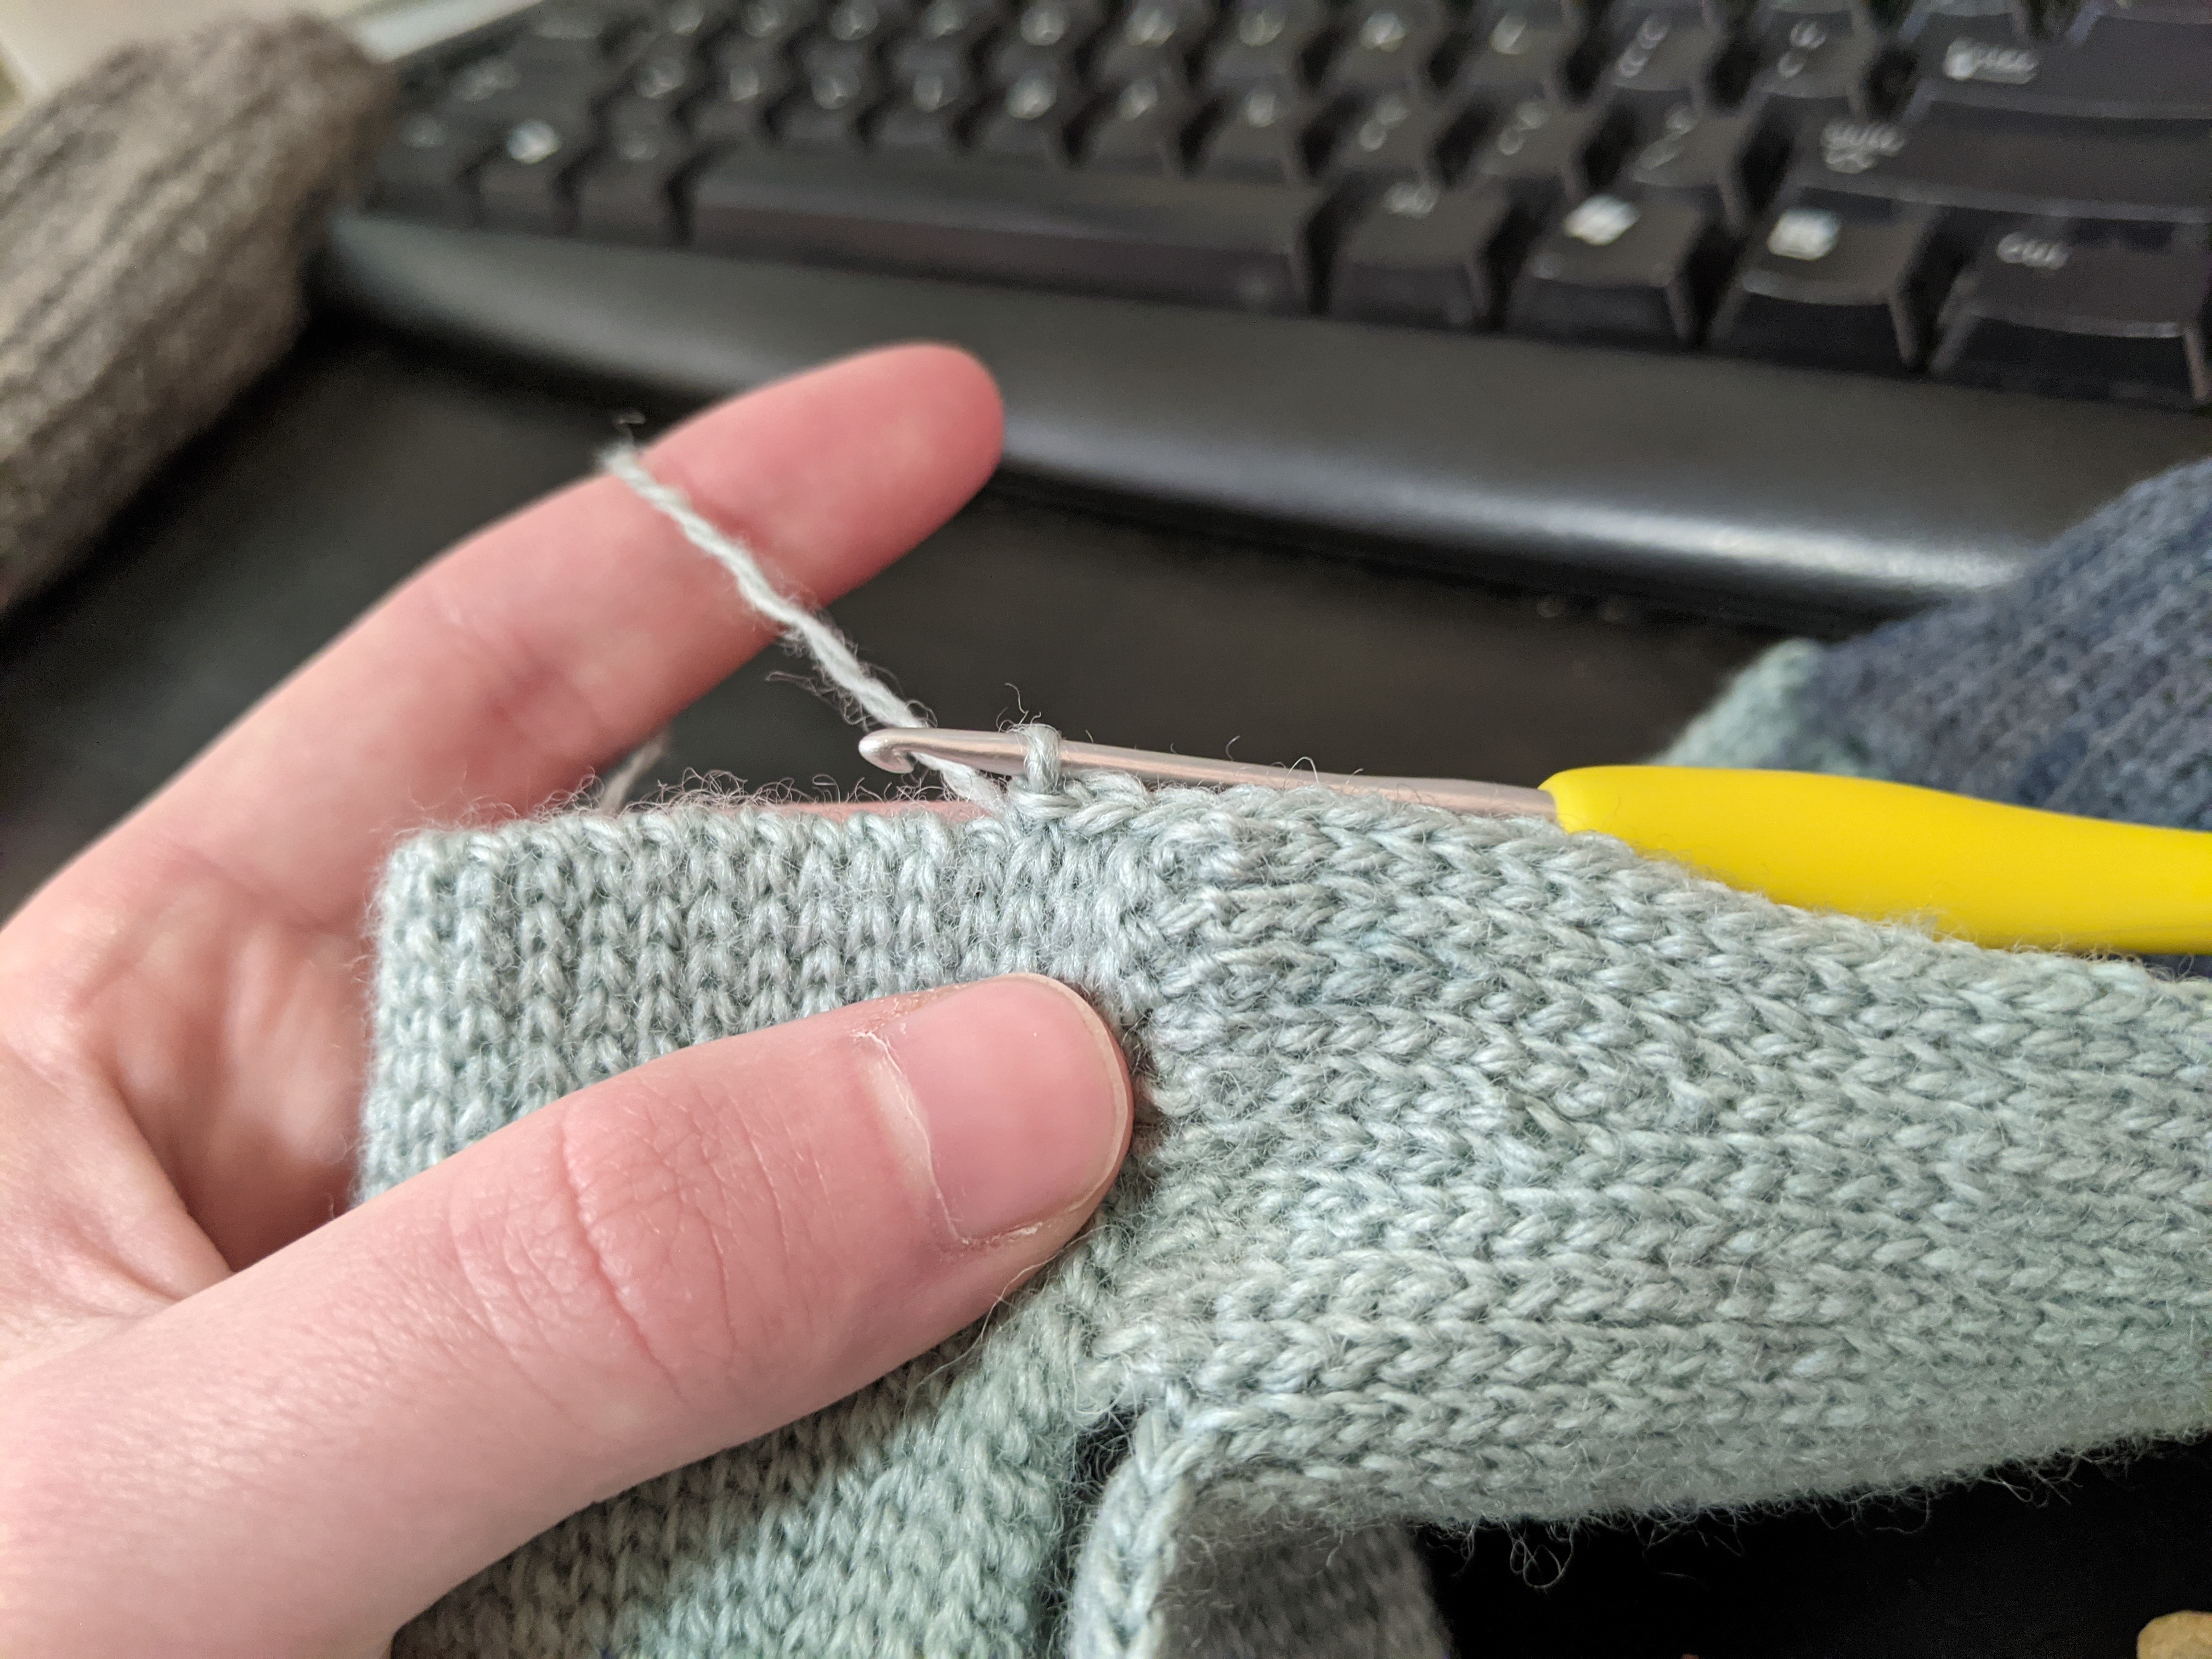
Leave the tail long (length x 3 + 8"). Turn the sock inside out, seam using the
Bickford Stitch.
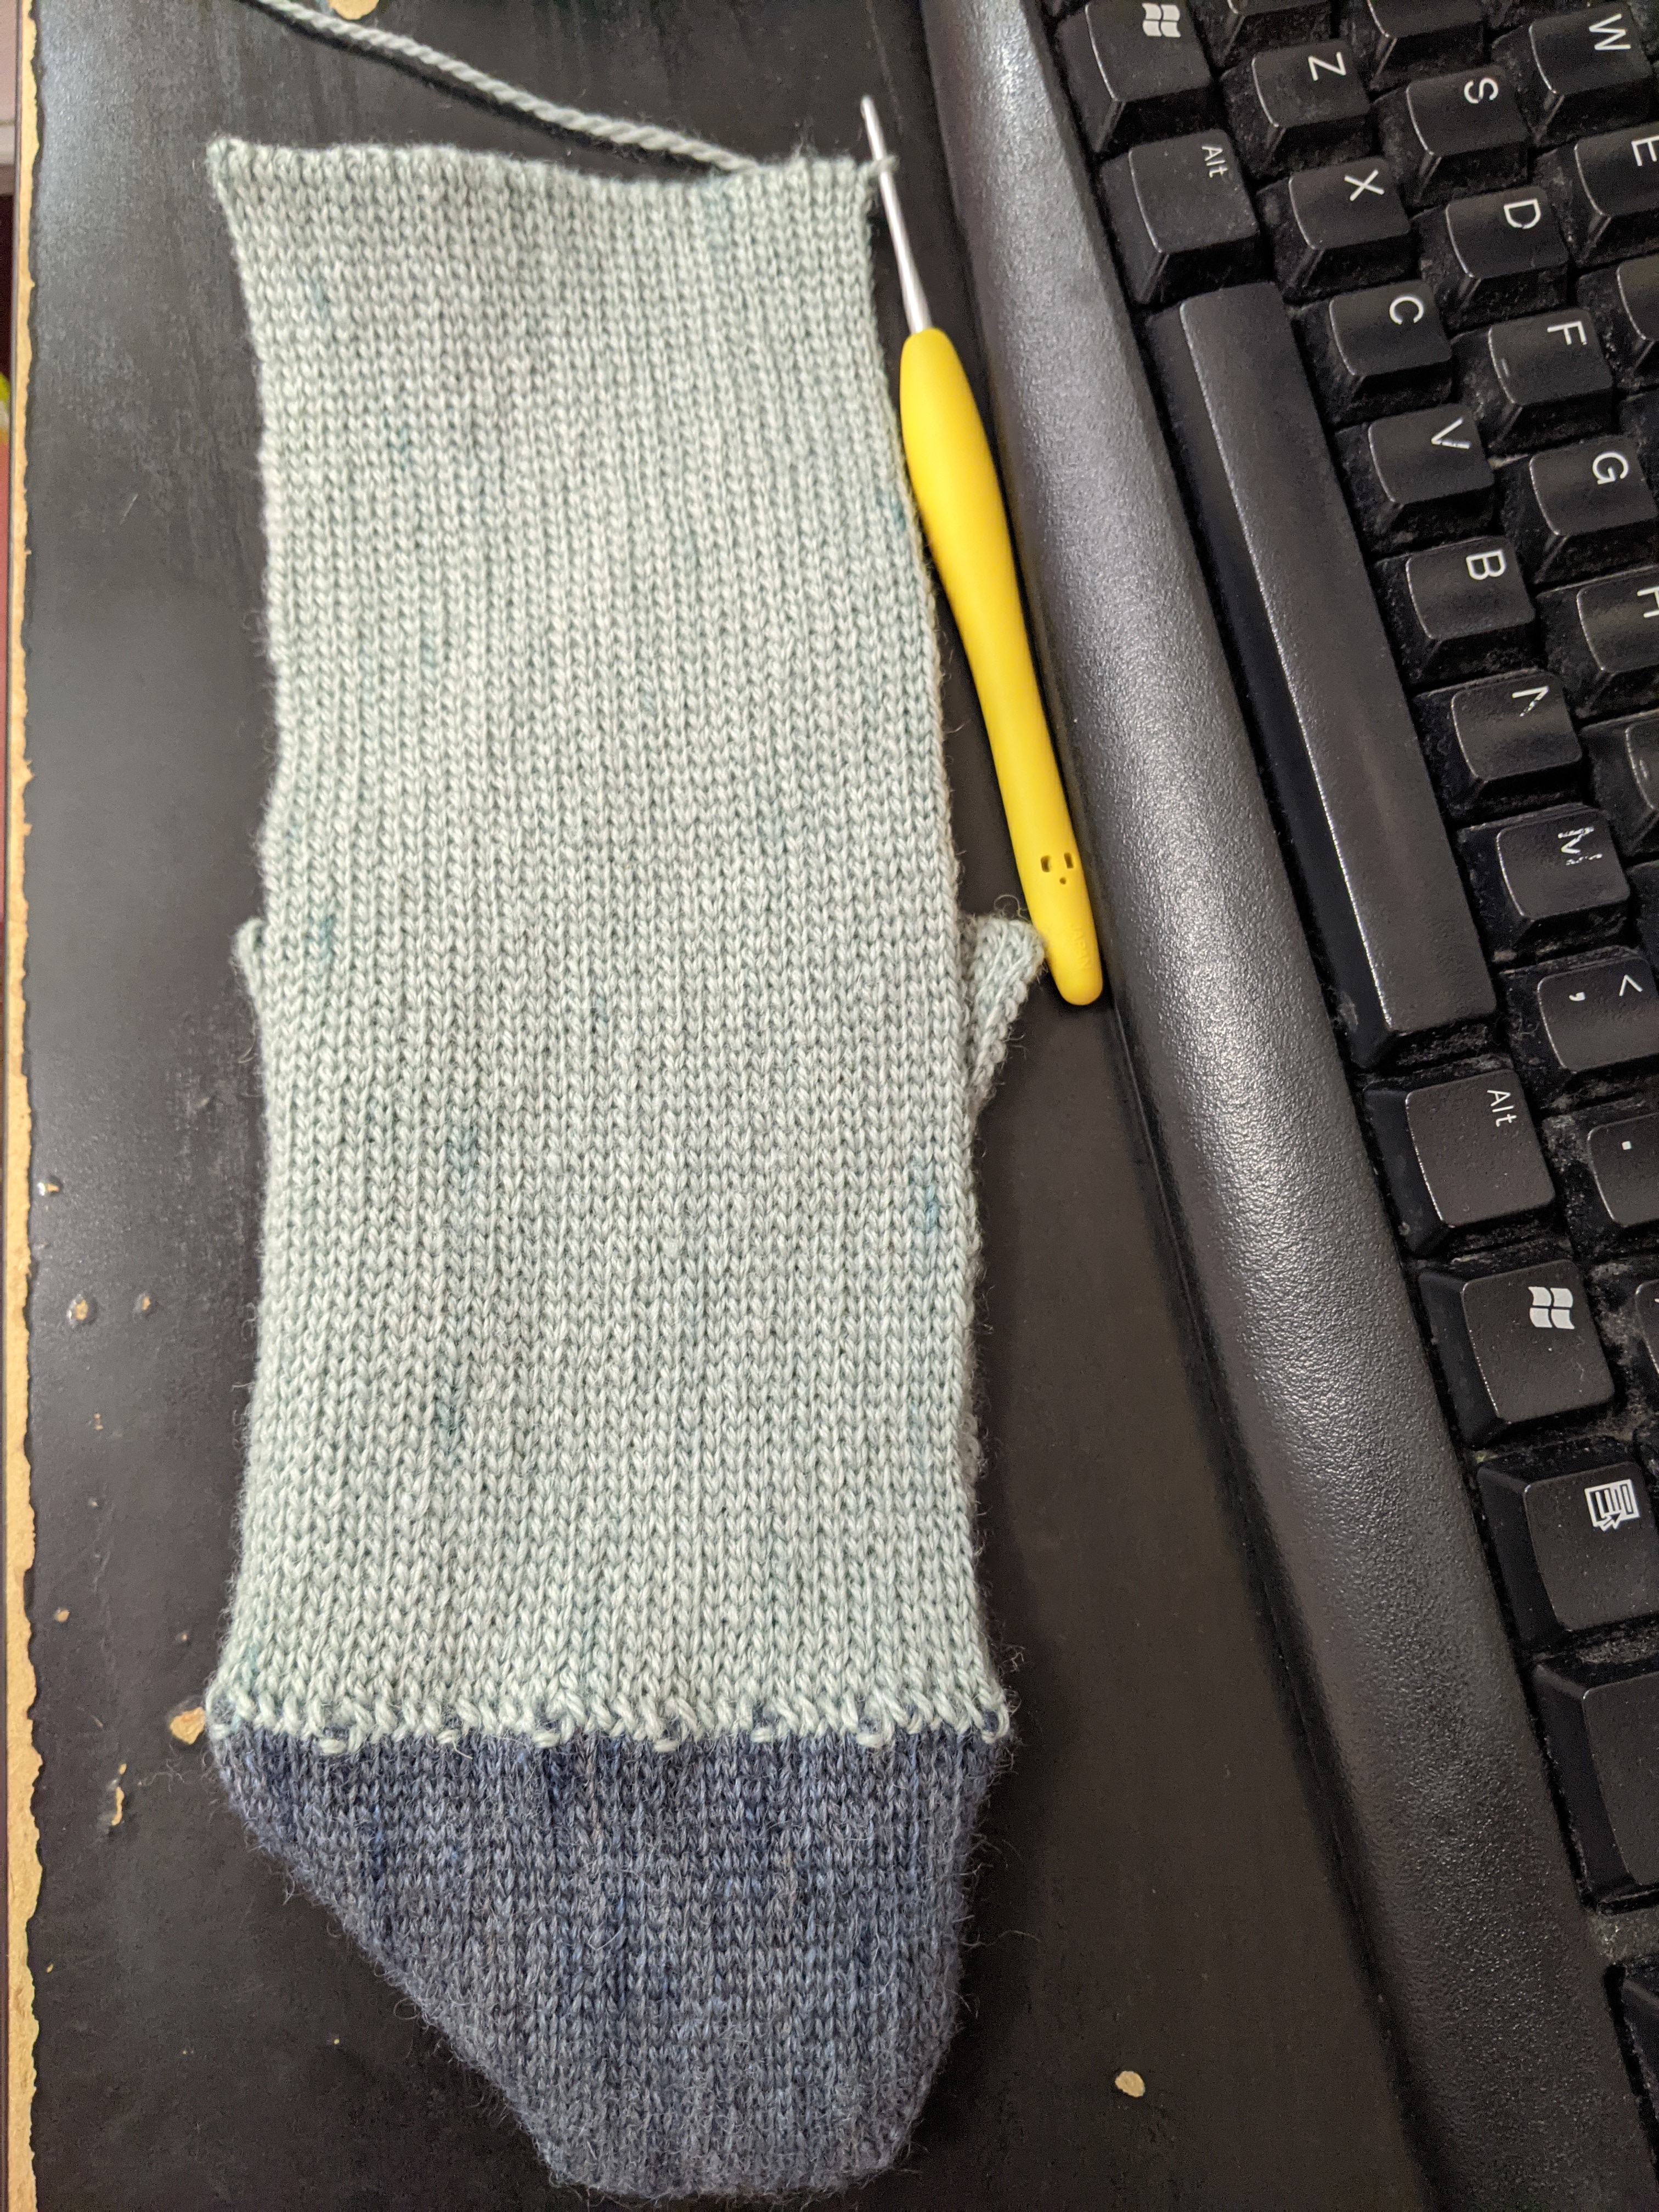
For the ankle section, sew the end up through the SLST joins to get to the bottom of the split and seam that too. Try it on before starting the second sock.
Right Sock
Start in the same toe stitch as the first sock, but insert the hook front to back, pull up a loop, and chain sock body height + 1. This is the bottom of the right sock. Leave the tail long for seaming (sock body length x 3 + 8").
SLST BLO in 2nd chain from hook and all the way down, SLST to same toe stitch. Then continue along with the same join ratio as the first sock.
Now the top of the sock. SLST BLO back up and chain sock ankle length + 1. SLST BLO in 2nd chain from hook and down, then make the rest of the top of the sock.
Now to make the back of ankle. SLST BLO back up, SLST BLO back down sock ankle length.
 |
Notice how this does NOT include the border stitches ((F - J)/2).
|
 |
| Should be the exact same stitch count as you chained earlier. |
Put in a stitch marker, flip the sock inside out, and
Bickford Stitch seam the side. Flip the sock again so the right side is facing out and SLST into the adjacent gusset/side/((F - J)/2) stitches.
Now look on the chart at how tall the semicircle side height is. Mine is 12. Add 1. So I'm going to count 13 stitches from the end of the semicircle side, and SLST into that stitch.
This does not count as a column.
Chain 1, turn, skip 2 stitches (the chain and the SLST). SLST BLO back up, and you've started the back of the ankle.
Regardless of what the toe:body join rate was, here the rate is 1:1 when joining to the heel semicircle. As you reach certain points the end of the semicircle side, count to make sure you're on track for everything to line up. It can be easy to miss semicircle stitches when joining.
 |
| At this point, go across the diagonals & top, putting your hook in each stitch so that it sticks out through the "v"s on the other side. |
Leave the tail long for seaming (seam length x 3 + 8").
Turn right side out.
Cuffs
With the right side facing out, insert the hook into the stitch to the right of the ankle seam and pull up a loop. Chain the desired height of the cuff; I recommend 3 stitches minimum, 1" maximum (though this is subject to personal preference).
Chain 1 more, SLST BLO in 2nd chain from hook and down, SLST to same stitch. Chain 1, turn, skipping 2 stitches (the chain and the SLST). Continue along working around the top of the sock counterclockwise.
If you are using the same yarn as you used for the toe, the join rate should be the reverse of whatever it was for joining the body to the toe. E.g., my join rate was 4:5. I did 3 normal joins, then joined 1 sock body column to 2 toe columns. So my join rate for the cuff will be 5:4. 3 normal joins, then 2 cuff columns to 1 ankle column.
(If you were using yarns with the same gauge and had a 1:1 join ratio, that will be the same here. If you are using a new yarn that has a different gauge than either the toe or body, you will need to calculate the join rate using the method originally explained.)
Turn inside out, seam, turn right side out.


Comments
Post a Comment